
Does the memory integrity feature in Windows Security appear grayed out? Is your PC saying, “Memory integrity is off. Your device may be vulnerable,” but you can’t turn on the toggle? The memory integrity feature prevents malicious software from accessing high-security processes when your device is invaded by malware.
But what causes this feature to be grayed out? In this article, we’ll discuss why you cannot turn on this feature and how to identify and fix the underlying problem.
What Causes Memory Integrity to Become Grayed Out on Windows 11?
The primary cause of memory integrity not working on Windows 11 is your drivers. When they become outdated or corrupt, you are likely to run into this problem. Likewise, if your system is outfitted with incompatible drivers, the memory integrity feature may stop working.
The error message itself usually explains where the problem lies, so fixing the problem is simple. You can fix faulty drivers, repair corrupted system files, update your operating system, revert an update, or remove incompatible drivers. Let’s discuss some fixes to get the feature working again.
As you apply each fix listed below, go to the Windows Security app and try enabling memory integrity again. It will help you identify what was causing the problem and fix it quickly without going through unnecessary fixes.
1. Identify and Fix Driver Issues
In most cases, the primary cause of the problem under discussion is outdated or incompatible drivers, so let’s start by checking your drivers. To begin with, uninstall any third-party drivers you installed recently. After that, open the Windows Security app, click on the Device security tab from the left sidebar, and click on Core isolation details.

Here, enable Memory integrity. If you encounter an error saying, “Resolve any driver incompatibilities and scan again,” click on the Review incompatible drivers link.

Then, note down any drivers Memory Integrity suspects are incompatible.

Following the above checks, follow these steps to rule out driver-related problems:
- Right-click on the Windows Start button and select Device Manager.
- Go to the View tab and click Show hidden devices.
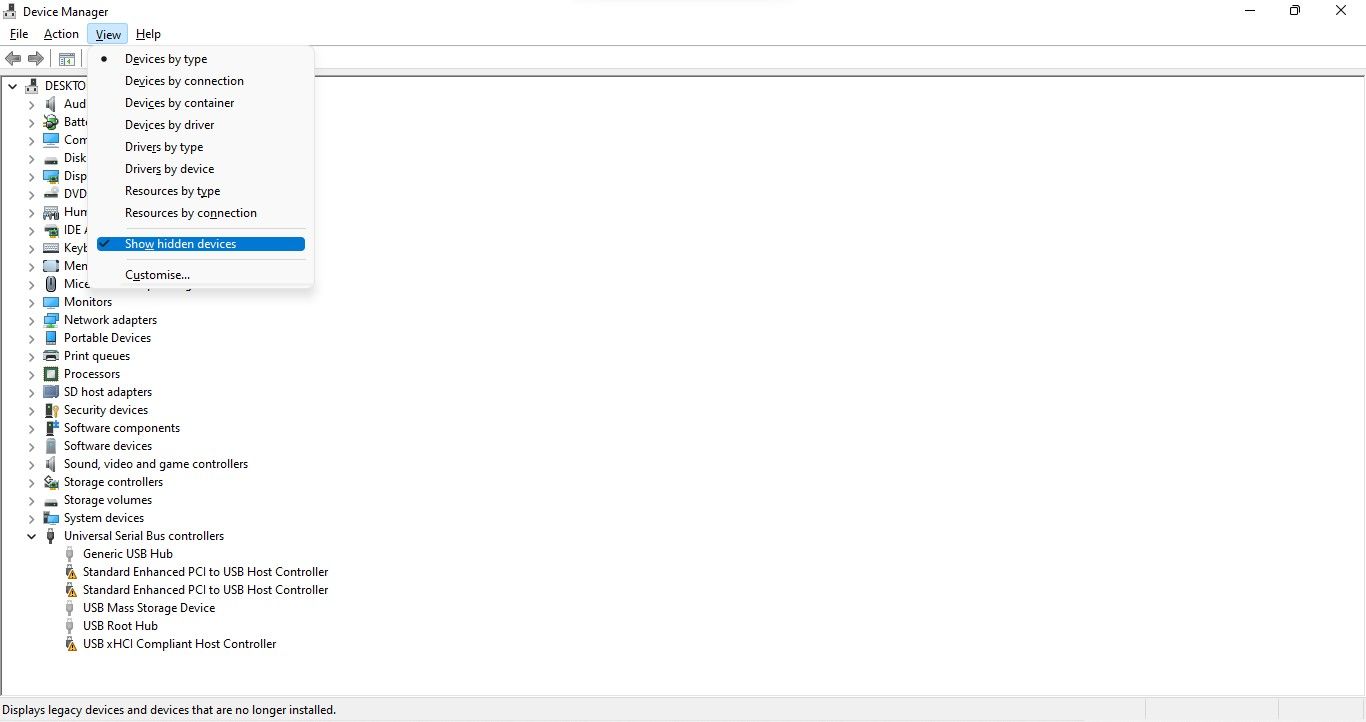
- Look for the device that has a yellow triangle on it with an exclamation mark inside it or the driver(s) with problems indicated by the Memory integrity.
- Right-click on that device and select Update driver.
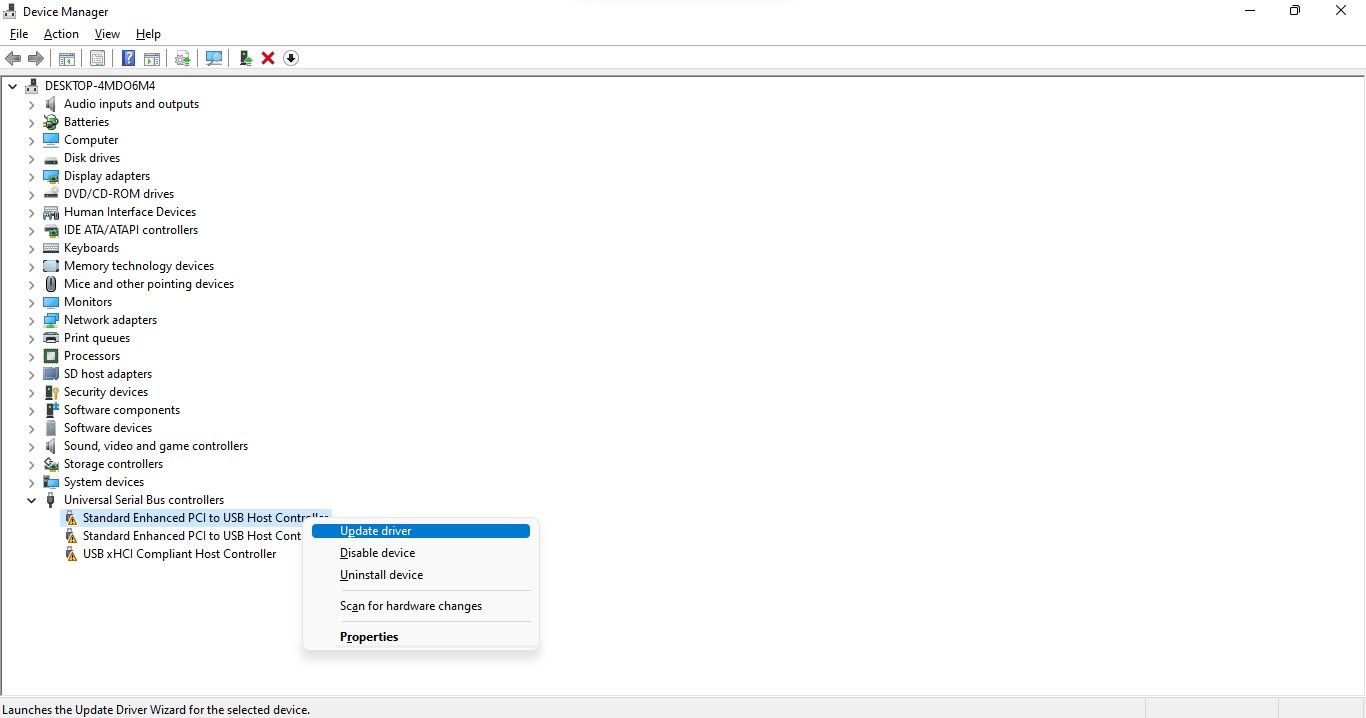
- If updating the driver does not solve the problem, right-click it and select Properties.
- Under the General tab, read the message in the Device status box.
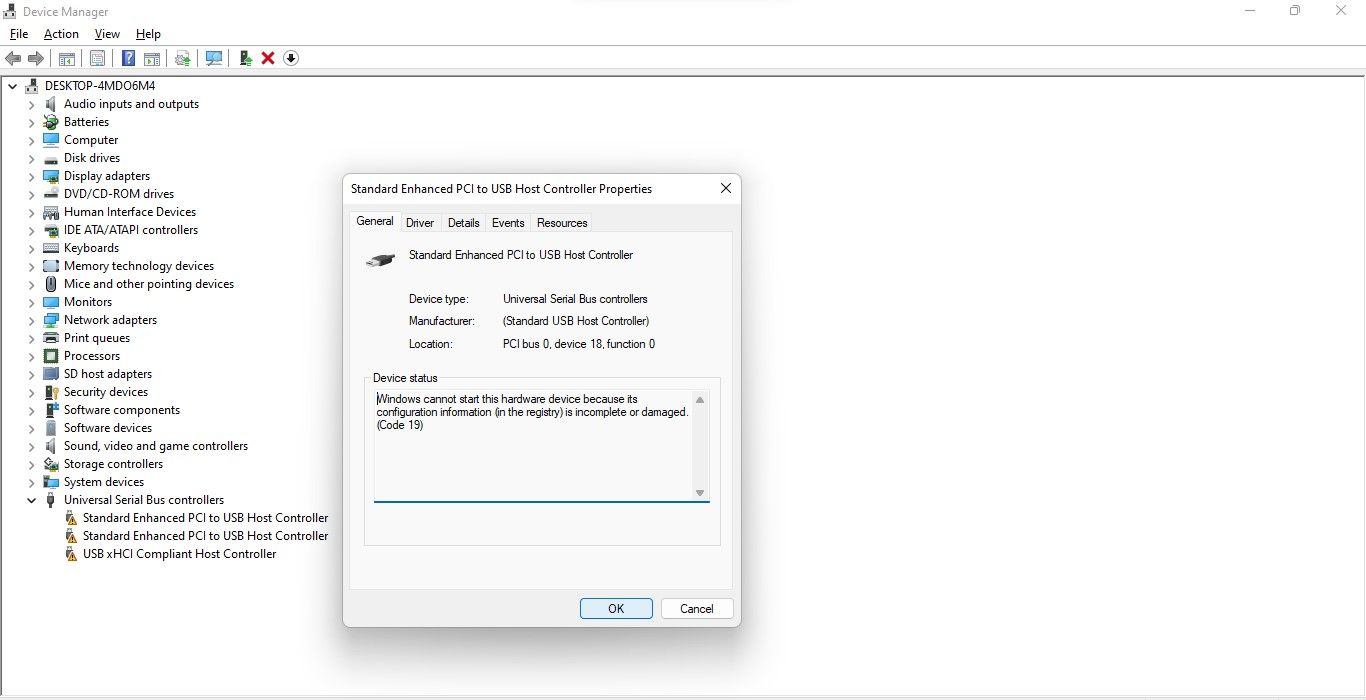
- Take note of the error code and visit the official Microsoft Support documentation where all Device Manager-related errors are listed.
- Find the relevant code information and apply the Microsoft recommended fix to fix the problem.


What if applying the Microsoft recommended fix doesn’t fix the problem with the driver, or there is no driver with a yellow triangle? In that case, you’ll have to use third-party software to locate and uninstall the incompatible or corrupt driver.
2. Find and Uninstall Incompatible Drivers
If you cannot locate the incompatible driver in Device Manager, use a third-party program, such as Autoruns, to identify corrupt or incompatible drivers and uninstall them.
You can follow these steps to do that:
- Download Autoruns from the Microsoft website.
- Unzip the compressed file.
- To run the app as an administrator, right-click on its executable file and select Run as administrator.
- Go to the Drivers tab.
- The drivers with issues will be highlighted, so locate them.
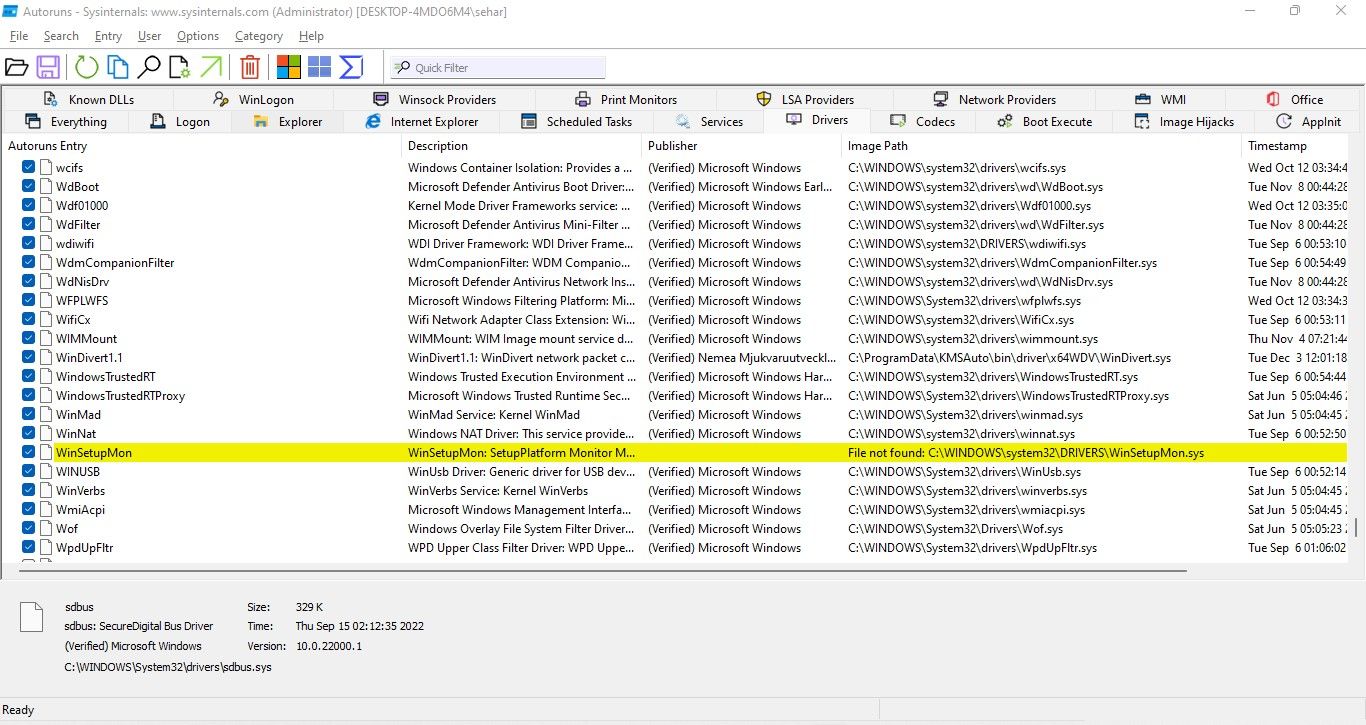
- Once they have been located, uncheck the box to disable them.
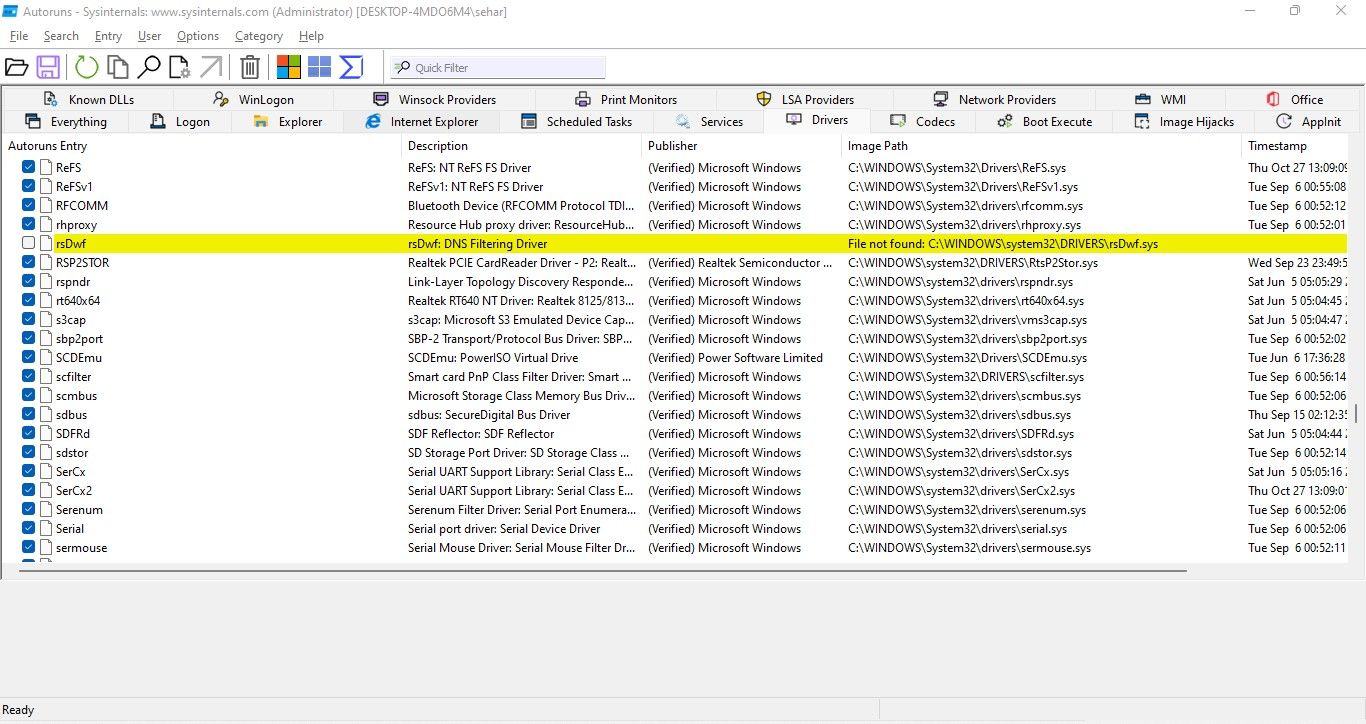
- If any driver gives an error when disabling, right-click it and select Delete.
- Install the latest drivers from the official website or reboot your device to let Windows install them automatically.


If you can’t locate drivers identified as incompatible by Memory integrity before, the Autoruns app will facilitate finding and removing them.
3. Uninstall Relevant Apps
If uninstalling the incompatible drivers does not work, you should uninstall the apps or software you installed from the same manufacturer as the drivers. Follow these steps to do that:
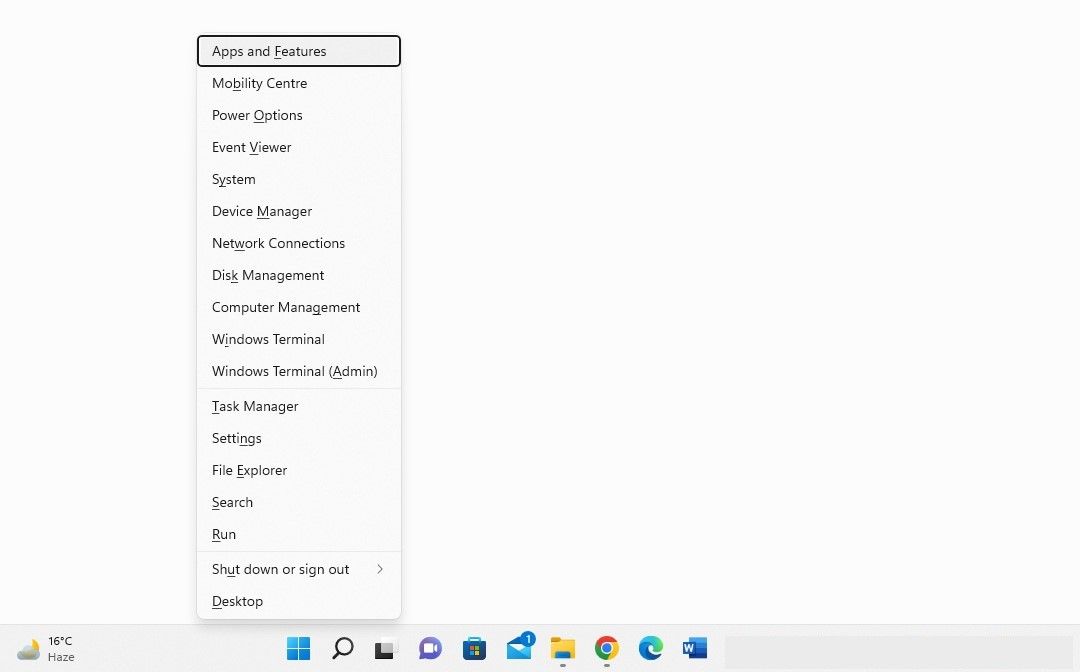
- Right-click on the Windows Start button and select Apps and Features.
- In the list of installed apps, locate the software from the same manufacturer.
- Upon finding them, click on the three vertical dots next to them and select Uninstall.
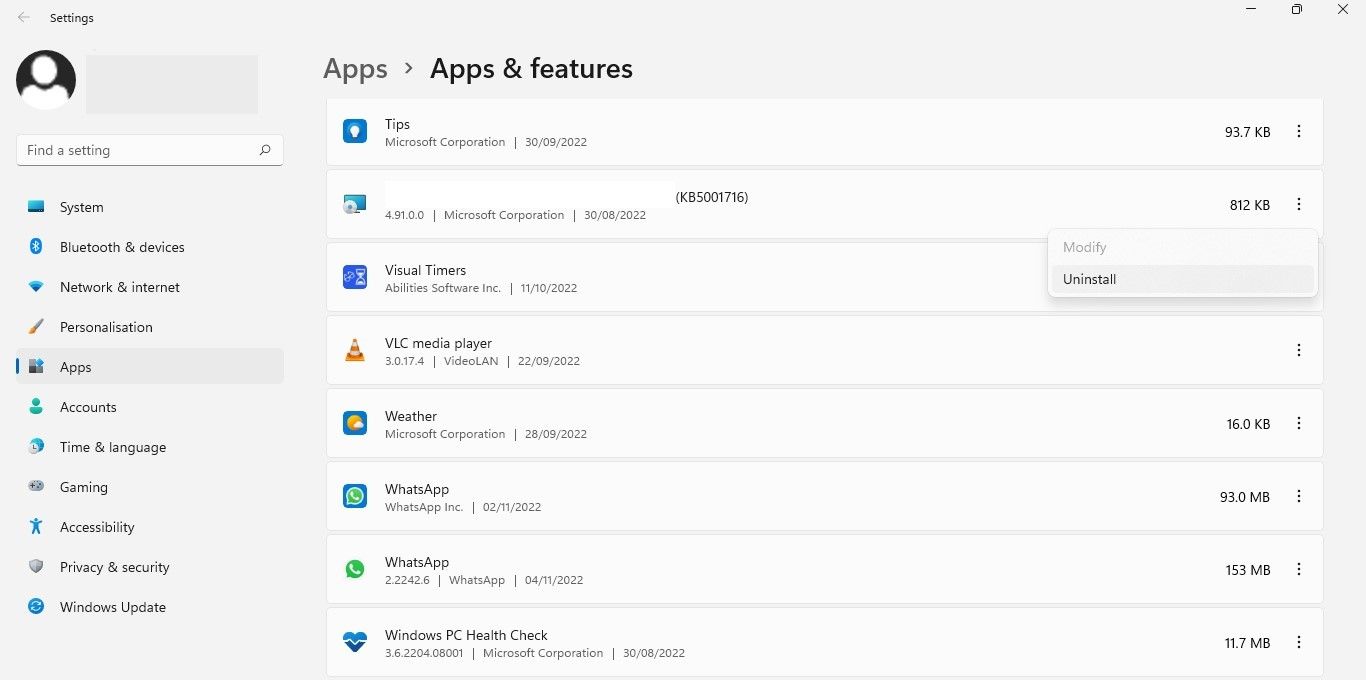


Uninstalling the relevant apps from the same manufacturer should resolve the issue. If it does not, ensure it isn’t a Windows Update issue.
If incompatible or corrupt drivers aren’t the problem, you should ensure your system is up-to-date and no updates are pending. To do this, right-click on the Windows Start button and select Settings. Next, navigate to Windows Update and click the Check for updates button on the right.

If they are paused, click Resume updates to let Windows update your system.

Moreover, if you’ve encountered a problem after installing an update recently, you should uninstall it. Our guide on uninstalling updates in Windows 10 and 11 explains how to do it. If pending or recently installed updates are not to blame, apply the next fix.
5. Fix Corrupt System Files
Corrupt system files are also a major cause of unforeseen issues with Windows features. The Memory integrity feature may have stopped working after a virus invaded your device and corrupted your system files. Thus, you must ensure that your system files are intact to rule out this possibility. An SFC scan can be helpful in this case.
Search for “Command Prompt” in Windows Search, right-click on the Command Prompt in search results and click Run as administrator. Then type “SFC /scannow” and press Enter.
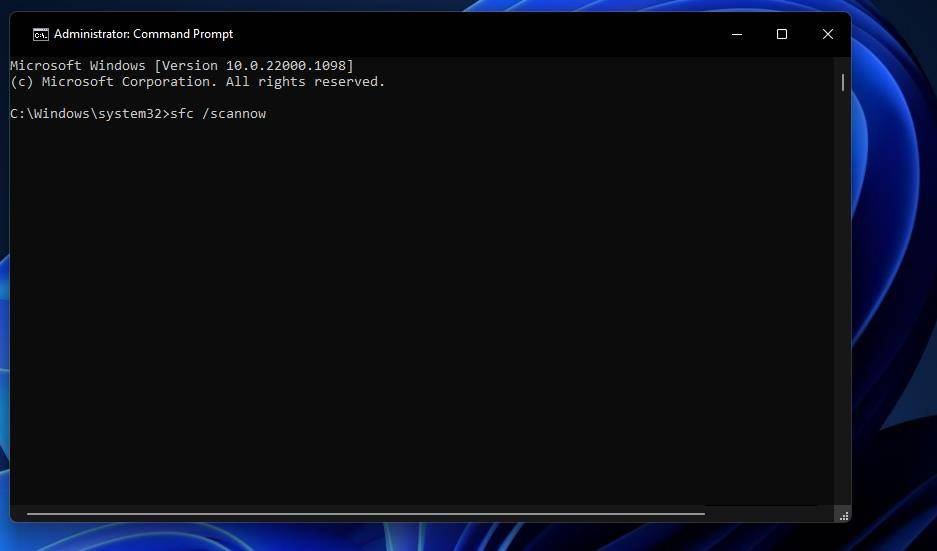
Once the scan is complete, refer to our guide on repairing corrupt system files with Windows built-in tools so you can properly analyze the results.
6. Reset the Windows Security App
Issues with the Windows Security app can also interfere with the functionality of security features, like memory integrity.
One way to rule out such issues is to reset the Windows Security app. Keep one caveat in mind, though: resetting Windows Security will revert any security customizations you’ve made to date. If you don’t mind that, you can reset Windows Security.
The process of resetting Windows Security is similar to resetting any other Windows app. Do that, and hopefully, the grayed-out memory integrity problem will resolve itself.
7. Alternative Method to Enable the Memory Integrity Feature
Using the Windows Security app isn’t the only way to enable Windows’ memory integrity feature. You can also adjust this setting within Registry Editor, which lets you access and modify Windows OS configuration settings. Therefore, if you are unable to turn on this feature from Windows Security, try enabling it from the Registry Editor.
Follow these steps to enable the memory integrity feature from Registry Editor:
- Type “Registry Editor” in Windows Search and open the Registry Editor.
- Navigate to the following path:
Computer\HKEY_LOCAL_MACHINE\SYSTEM\CurrentControlSet\Control\DeviceGuard\Scenarios\HypervisorEnforcedCodeIntegrity - Right-click on the Enabled key in the right pane and select Modify…
- Enter “1” under Value data if it is not already there.
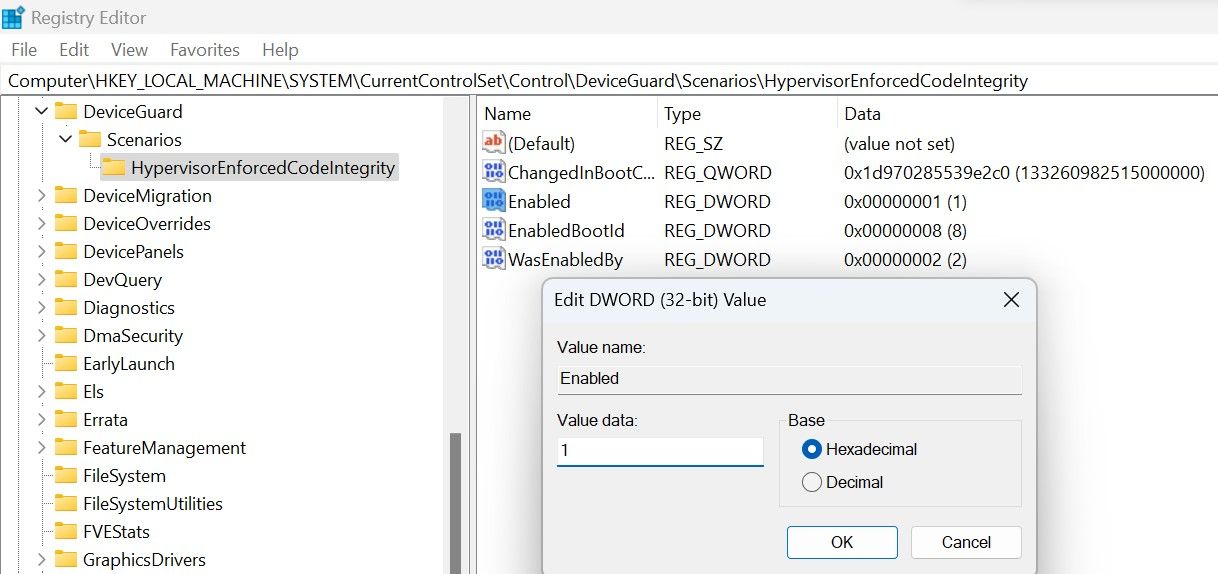

Misconfiguring keys in the Registry Editor can have unintended consequences. If you are unfamiliar with tweaking the registry, you can skip this step.
Turn On the Memory Integrity Feature Again
Memory integrity is a critical security feature, and if it is not enabled, it can seriously compromise the security of your device. Hopefully, by applying the fixes mentioned in the article, you will solve the problem and easily turn on Memory Integrity.
#Ways #Fix #Memory #Integrity #Feature #Grayed #Windows
Comments