Many users capture webcam photos with the pre-installed Windows 11/10 Camera app. However, some users have reported an error code that appears when they click on Windows Camera’s “take photo” button that reads “0xA00F424F <PhotoCaptureFileCreationFailed> (0x80131500).”
The code’s error message says, “Sorry, we weren’t able to save the photo.” As you might expect, the Camera app won’t save any new photos when this error appears. As such, this is how you can fix the “photo capture file creation failed” error on Windows.
1. Check the Camera Access Permission Settings
First, check that webcam access permission is set for the Camera app. This is how you can enable apps to access the webcam in Windows:
- Click Settings on your Start menu.
- Select the Privacy tab/category.
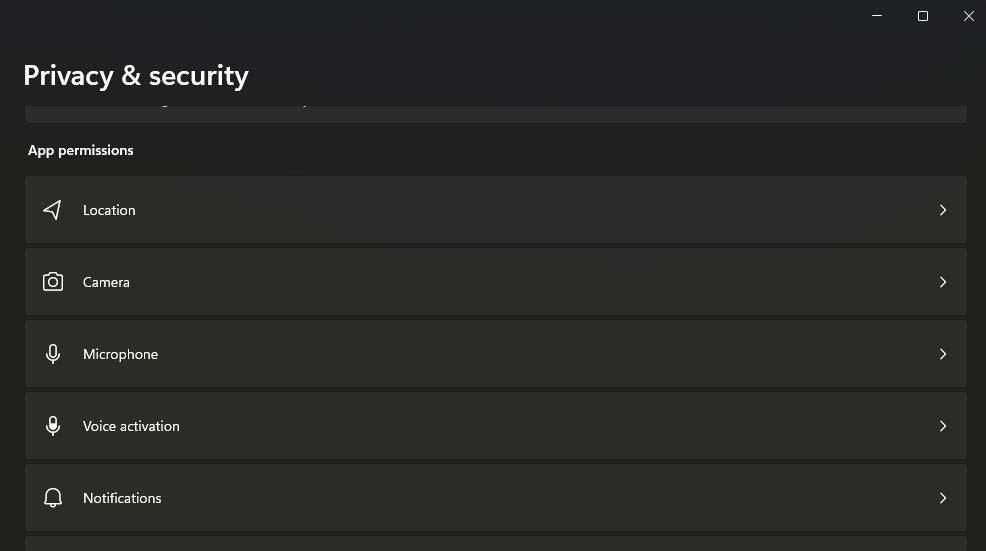
- Click on Camera to view app permission settings for the webcam.
- Toggle on the Let apps access your camera (or Allow apps) setting.
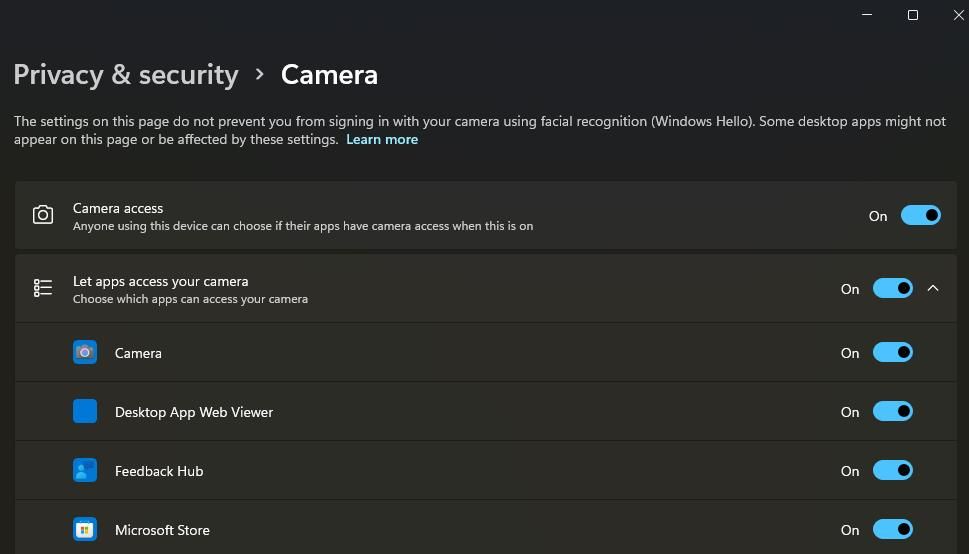
- Turn on the switch for the Camera app setting.


2. Reset the Windows Camera

Windows has a Reset troubleshooting option for fixing apps that aren’t working right. Resetting the Windows Camera app will clear its data. That’s worth a try since it’s a straightforward potential fix to apply.
Our guide on how to reset a Window app includes instructions for applying this potential fix in Windows 11 and 10.
3. Create a New Camera Roll Folder
The “photo capture file creation failed” error can occur because the Camera Roll folder has been deleted. Users confirm creating a new Camera Roll folder can fix this issue when the old one has been deleted. You can create a new Camera Roll folder like this:
- Open File Explorer with the Win + E keyboard shortcut.
- Then go to this folder path:
C:\Users\<user folder>\Pictures\ - If you can’t find Camera Roll in the Pictures folder or any subfolder there (such as Screenshots), you’ll need to recreate that folder. Right-click inside the Pictures directory and select New > Folder.
- Input Camera Roll to be the new folder’s name and press Enter.

Also, check if the Camera Roll folder has been moved out of the Pictures folder to another directory. If it has, moving Camera Roll back into the default Pictures location could also resolve this issue.
4. Set a Different Camera Roll Library Location
Setting a different Camera Roll library save location is another fix that’s worked for some users. To do so, you’ll need to add and set a new save location within the Camera Roll Properties window as follows:
- Open the Run dialog and input the following path in the Open box:
%APPDATA%\Microsoft\Windows\Libraries - Click OK to bring up a Libraries directory.
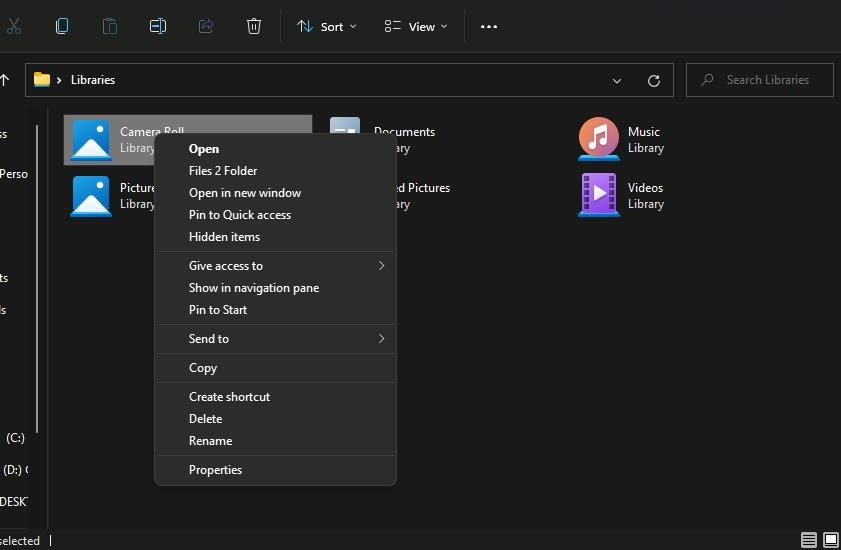
- Right-click Camera Roll to select Properties.
- Click Add on the Library tab.
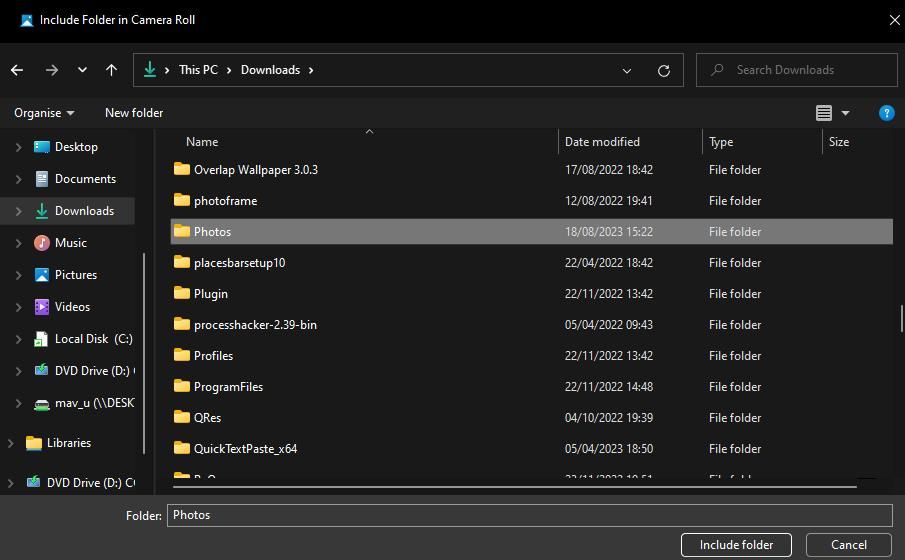
- Next, select a folder location such as Downloads.
- Right-click inside the Include Folder in the Camera Roll window to select New > Folder.
- Enter Photo for the new folder title.
- Click the Include folder button.
- Select the Photo folder in the Library locations box.
- Click Save set location.
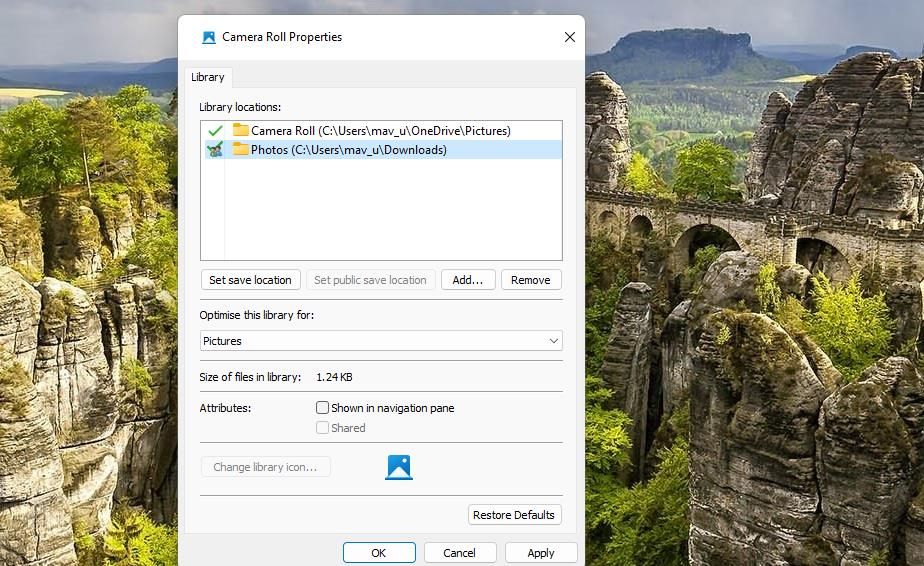
- Select Apply to set the new save location.
- Click on OK to exit the Camera Roll Properties window.


Some users also say that restoring default locations in the Library tab worked for them. To do that, click the Restore Defaults button in the Camera Roll Properties window.
5. Change Where Your Photos and Videos Get Saved
Some Camera users have also said changing where that app saves pictures can resolve the “photo capture file creation failed.” If you have an external drive, alternative partitions, or USB stick, you can set photos to save there as follows:
- Open the file and app search utility with the Win + S keyboard shortcut.
- Next, type Default save locations in the search tool’s box.
- Select Default save locations to bring up those settings.
- Then click the New photos and videos will be saved to option.

- Select a different drive or partition to save images to.
- Click Apply to set the new location.

If you don’t have any alternative place for saving photos, you could set up a new drive partition with Disk Management. Then select to save photos to the new drive partition within Settings.
6. Update Your Webcam’s Driver
Camera app issues can occur if your webcam’s driver is outdated. Updating your webcam’s driver will ensure the camera works better with software.
Our guide to replacing and finding Windows drivers explains how you can manually update your device drivers.
7. Reinstall the Windows Camera
If the “photo capture file creation failed” continues after trying other solutions in this guide, you might have to reinstall the Windows Camera app to get this issue sorted. Then you’ll have a fresh copy of the latest Windows Camera app version. As you can’t uninstall that app via Settings, you’ll need to remove Camera via Powershell and then reinstall it as follows:
- Press Win + S and type “PowerShell”.
- Select to open PowerShell with admin permissions by clicking its Run as administrator option.
- Then input this command to view the apps list:
Get-AppxPackage - Click the PowerShell window title bar with your right mouse button to select the Edit and Find context menu options.
- Input camera in the Find what box.
- Click Find Next to highlight the Camera app in the list.
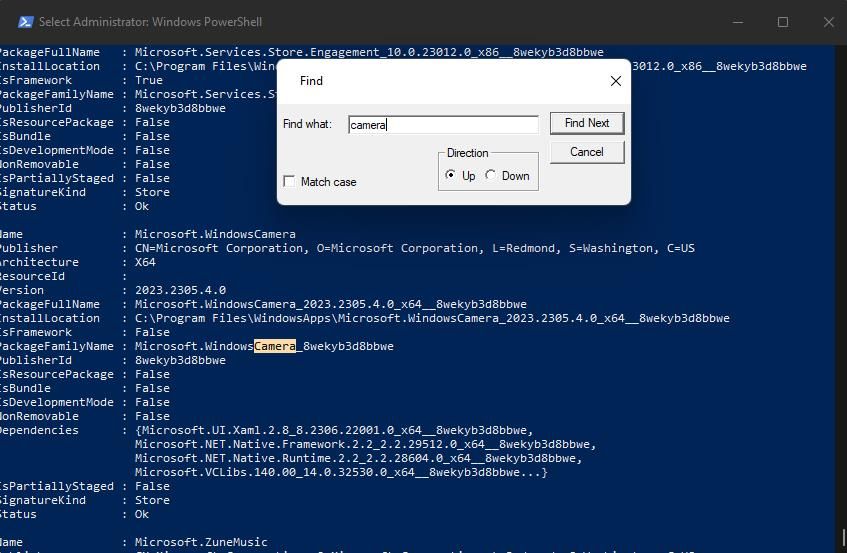
- Then copy the app’s PackageFullName ID by selecting its text and pressing Ctrl + C. The PackageFullName will be something like Microsoft.WindowsCamera_2023.2305.4.0_x64__8wekyb3d8bbwe, but it can vary depending on the app version.
- Input and execute this command with the PackageFullName included:
Remove-AppxPackage PackageFullName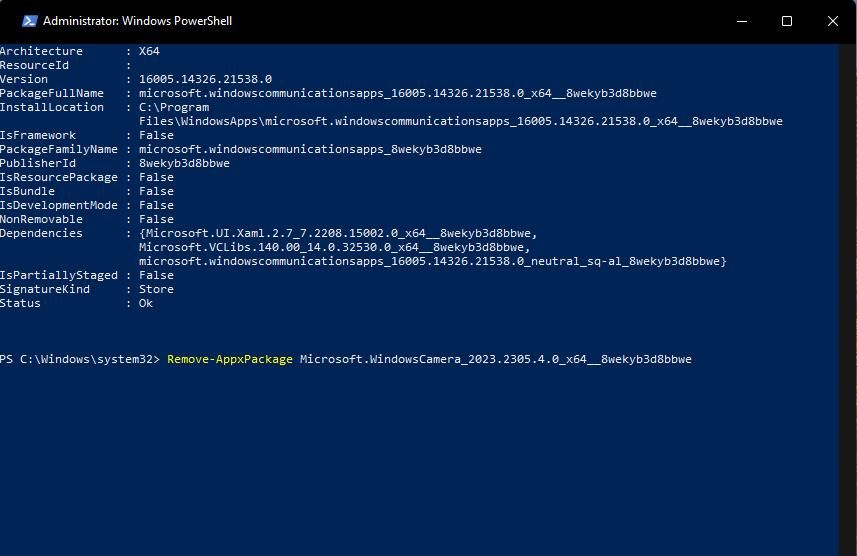
- Exit PowerShell and open this Windows Camera page on the Microsoft Store.
- Click Get in Store app and Open in Microsoft Store app to access an installation option.

- Press Get to reinstall Windows Camera.


You will need to replace PackageFullName in the command specified above with the actual package name. So, the PowerShell command should look more like this:
Remove-AppxPackage Microsoft.WindowsCamera_2023.2305.4.0_x64__8wekyb3d8bbwe
Get Snapping With the Windows Camera App Again
The “photo capture file creation failed” error is quite a common Windows Camera app file-saving error. Lots of users have remedied that Camera error with the potential fixes outlined in this guide.
#Fix #Photo #Capture #File #Creation #Failed #Camera #App #Error #Windows
Comments